
The Bite Book: E-Board Cookbook
- Bite Club

- May 16, 2025
- 16 min read
As this last semester comes to a close and people’s free time opens up, our E-Board has plenty of delicious recipes for you to recreate in your kitchen. From appetizers to main courses to desserts, this cookbook created by the Bite Club E-Board has plenty of recipes for you to try this summer or save for later.
🍴Abby, Vice President
Dish: Miso Soup
My mother always made miso soup for me growing up—it was a dish that always seemed to pair perfectly with any food we were eating, whether it was noodles or rice. The simplicity of its recipe meant it was one of the first dishes I learned to make by myself.

Ingredients:
Miso soup paste
Broth (dashi, bone, vegetable, etc.)
Firm or silken tofu
1 green onion
Sheet of seaweed (optional)
Instructions:
Boil 2 cups water, broth, whatever base you’re using.
Slowly stir in 2 tablespoons of miso paste.
Chop tofu into cubes.
Chop green onion into thin rounds.
Add tofu and green onion.
Cut/tear seaweed and add it in.
Enjoy!
🍴Elva, Co-Editorial Director
Dish: Coca-cola wings
This dish was one of my favorite things my mom made growing up. She always played off this recipe as her “secret ingredient” chicken. It wasn’t until I was in middle school that I saw her pour a can of Coca-Cola into the pan, where her secret ingredient was revealed. When I asked her about the exact measurements, she replied, "I’ve never measured anything when cooking”. That being said, use this as a guide and experiment with it yourself!

Ingredients:
2 lbs of chicken wings
1 Tablespoon of Oil
1 can of Coca-Cola
1 Tablespoon of Dark Soy Sauce
1 Teaspoon of Cooking Wine
A few slices of ginger
Salt as desired
Water
Instructions:
Prep the chicken by scoring the top of the chicken wings.
In a big pot, boil the chicken in water with 2 slices of ginger for 2 minutes.
Take the chicken out, rinse it with cold water, and pat dry with a paper towel.
Heat up the wok (or pan) on medium high heat, add oil, and brown the chicken on both sides.
Once brown, add a few slices of ginger and soy sauce. Toss the chicken in this mixture for about 2 minutes or until you can smell the ginger.
Add the can of Coca-Cola into the wok, turn the heat to medium low, and let the chicken simmer with the lid on.
Once half the cola has been reduced, add salt as desired.
After 15-20 minutes, the Coca-Cola sauce should have been reduced and thickened.
Serve and Enjoy!
🍴Meera, vice president
Dish: fall swiss chard and pomegranate salad
I wanted to experiment with some new ingredients and made this recipe for a Friendsgiving and it did pretty well, some even calling it the highlight dish of the event. Make some yourself and have a taste of this amazing and unique salad.

Ingredients:
Base (3-4 cups total, portion as desired)
Chopped Kale Leaves
Chopped Swiss Chard Leaves
Baby Arugula
Add-Ins
1 cup Sliced Celery
1 cup Diced White Onions
1 cup Pomegranate Seeds
1 cup Sliced Swiss Chard Stems
Balsamic Vinegar
Honey
¾ cup Shredded Parmesan Cheese
½ cup Sliced Almonds or Almond Slivers
Dressing
½ cup Olive Oil
¼ cup Red Wine Vinegar
1 tbsp Paprika
Salt & Pepper
1 tsp Truffle Seasoning (optional)
1 tbsp Garlic Powder
1 tsp Honey
¼ tsp Baking Soda
Instructions:
Prep base and add-in ingredients as written or as desired above.
In a medium-sized pan, cook your diced whiten onions on medium heat until they start to look translucent. Remove from the pan and set aside to cool.
In the same pan, add your sliced swiss chard stems and add in a tsp of balsamic vinegar and tbsp of honey. Make sure everything is evenly coated and cook until fork tender. Remove from the pan and set aside to cool.
While those cool, make your dressing.
Add as much dressing as you’d like to your base and massage it in, making sure all the leaves are coated.
Add in your add-ins, toss lightly and enjoy :)
🍴Odette, treasurer
Dish: sichuan-style cold noodles
This recipe is adapted from my mom and originates in Sichuan, China, where my family is from. I grew up having these noodles with my family and friends all the time– so much that they became a regular menu item at our 4th of July barbeque. For me, they represent a reconnection with my cultural roots and fun socials with my favorite people on hot summer days.

Ingredients:
Noodles
1 pot boiling water
2 oz dry wheat noodles
1 tsp sesame oil
1 large cucumber (or 2 small)
1 cup mung bean sprouts
3 cloves minced garlic
2 scallions, sliced
Sesame seeds, for garnish
Sauce
2 tsp sugar
1 tsp salt
1 tbsp chili oil
1 tbsp soy sauce
1 tsp black vinegar
1 tsp sesame oil
Instructions:
Bring a large pot of water to a boil.
Add noodles and boil until al dente (or firm).
Strain noodles, place in a serving bowl, add 1 tsp sesame oil.
Cover noodles, place in fridge to cool for 1-2 hours.
Boil mung bean sprouts, 2-3 minutes; strain and set aside.
Add in Julienne cucumbers and set aside.
Add all sauce ingredients into a small bowl and combine.
Remove noodles from the fridge, add cucumbers, mung bean sprouts, minced garlic, scallions, and sauce to taste (alternatively, place sauce and toppings on the side and let guests add however much you’d like).
Garnish with sesame seeds.
Enjoy!
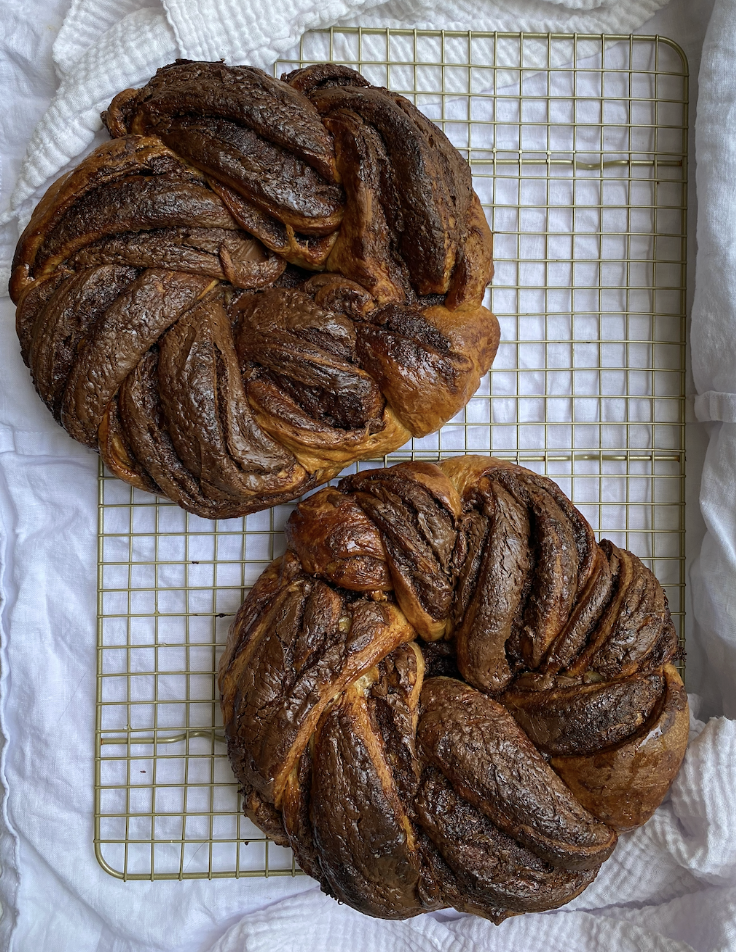
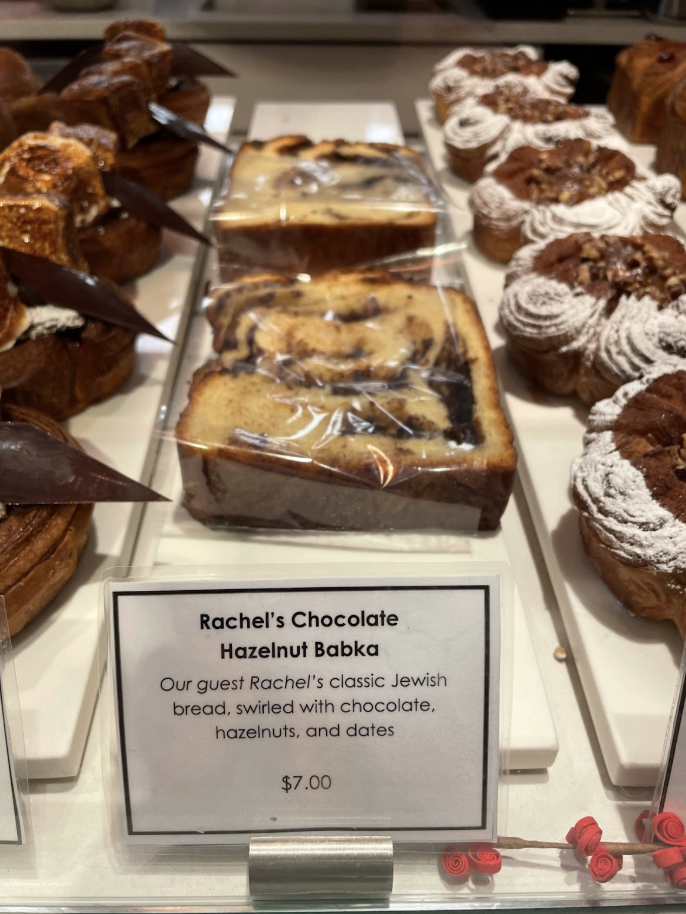
🍴Rachel, Co-social Director
Dish: babka
My biggest baking passion project has been in finding the perfect Babka recipe. I worked on it for several years before coming to college and had my own babka stand at a farmer’s market for a summer. From sharing my babka with communities in Nashville and New York to winning the “Anyone Can Bake” competition hosted by Dominique Ansel and having my babka featured at the bakery for a weekend, I’ve loved creating the perfect recipe! While I can’t share my top secret babka recipe, this King Arthur Babka recipe is pretty fantastic and a great place to start for anyone interested in homemade babka!

Ingredients:
Dough
1 to 1 1/4 cups (227g to 283g) lukewarm water
2 large eggs
6 1/4 cups (750g) King Arthur Unbleached All-Purpose Flour
1/3 cup (37g) King Arthur Baker's Special Dry Milk or nonfat dry milk
2 tablespoons instant yeast, SAF Red or SAF Gold instant yeast preferred
1/2 teaspoon cinnamon
1/2 cup (99g) granulated sugar
2 1/2 teaspoons (15g) table salt
10 tablespoons (142g) unsalted butter, at room temperature**
1 tablespoon (14g) King Arthur Pure Vanilla Extract
**Reduce the salt to 2 1/4 teaspoons if you use salted butter.
Filling
1/2 cup (99g) granulated sugar
1/2 teaspoon cinnamon
1/3 cup (28g) unsweetened cocoa, Dutch-process or natural
1/2 teaspoon espresso powder
4 tablespoons (57g) butter, melted
1 cup (170g) finely chopped semisweet chocolate or semisweet chocolate chips, mini chips preferred
1 cup (113g) diced pecans or walnuts, toasted if desired
Topping & Glaze
1 large egg, beaten with a pinch of salt until well-combined (for glaze)
4 tablespoons (57g) butter, melted
1/2 teaspoon cinnamon
2/3 cup (74g) confectioners' sugar
1/2 cup (60g) King Arthur Unbleached All-Purpose Flour


Courtesy of Rachel Westerfield
Instructions:
Weigh your flour; or measure it by gently spooning it into a cup, then sweeping off any excess.
To make the dough: In a large bowl or bowl of a stand mixer, combine all of the dough ingredients (starting with the lesser amount of water), mixing until everything is moistened. Add additional water if necessary to enable the dough to come together. Cover the bowl, and let the dough rest for 20 minutes. Then mix/knead it until it's soft and smooth.
Place the dough in a lightly greased bowl, and cover the bowl. The dough is going to rise for about 1 1/2 to 2 hours, until it's quite puffy.
Gently deflate the dough, and divide it in half. Set the pieces aside, covered, while you make the filling.
To make the filling: Combine the sugar, cinnamon, cocoa, and espresso. Stir in the melted butter. The mixture will look grainy and slick; that's OK.
Shape each half of the dough into a 9" x 18", 1/4"-thick rectangle. If the dough "fights back," let it rest for 10 minutes to relax the gluten, then stretch it some more. Don't be fussy about this; 19" or 20" is as good as 18".
Smear each piece of the dough with half the filling, coming to within an inch of the edges.
Scatter half the nuts, and half the chopped chocolate/chips over each piece. If using standard-size chips, process them in a food processor first, to create smaller bits of chocolate and a less chunky filling.
Starting with a short end, roll each piece gently into a log, sealing the seam and ends. Working with one log at a time, use a pair of scissors or a sharp knife to cut the log in half lengthwise (not crosswise) to make two pieces of dough about 10" long each; cut carefully, to prevent too much filling from spilling out. With the exposed filling side up, twist the two pieces into a braid, tucking the ends underneath. Repeat with the other log. Place each log into a lightly greased 9" x 5" loaf pan.
Brush each loaf with the egg glaze. Mix together the topping ingredients until crumbly, and sprinkle half the topping over each loaf.
Tent each pan with plastic wrap, and let the loaves rise until they're very puffy and have crowned a good inch over the rim of the pan, 1 1/2 to 2 1/2 hours. Towards the end of the rising time, preheat your oven to 300°F.
Bake the bread for 35 minutes. Tent lightly with foil, and bake for an additional 15 to 25 minutes (for a total of 50 to 60 minutes); the loaves should be a deep-golden brown.
To ensure the loaves are baked through, insert a digital thermometer into the center of one loaf. It should register at least 190°F.
Remove the loaves from the oven, and immediately loosen the edges with a heatproof spatula or table knife. Let the loaves cool for 10 minutes, then turn them out of the pans onto a rack to cool completely.
Serving and storage information: Slice the babka and serve it at room temperature; or rewarm individual slices briefly in a toaster, if desired. Store any leftovers, well wrapped, at room temperature for several days; freeze for longer storage.
🍴Shayla, president
Dish: foolproof banana bread
This banana bread can do no harm. It’s forgiving to mistakes and imprecise measurements; it’s great fresh or on the go. This bread is best enjoyed unplanned. So, next time your Trader Joe’s bananas get ripe a little too quickly, consider turning them into a delicious baked good! I enjoy this for breakfast, as a snack, and even for dessert. There are so many ways to make it your own, so don’t be shy and have fun

Ingredients:
3-5 ripe bananas
⅓ cup butter melted
½ tsp baking soda
1 pinch salt
½ cup sugar
¼ cup brown sugar
1 large egg beaten
2 tsp vanilla extract
1 ½ cups flour
Ground cinnamon (optional)
Protein powder (optional)
Cashews/walnuts/crunchy topping of your choice (optional)
Chocolate chips or cocoa powder (optional)

Instructions:
Preheat oven to 350℉. Butter the bread pan or line it with parchment paper if you don’t want to leave your loaf in the pan.
In a large bowl, mash bananas well with a fork. Once a consistent texture is achieved, stir in melted butter.
Mix in everything else: baking soda, salt, sugar, beaten egg, and vanilla extract. Then, gradually add in the flour a little at a time (it may be easier to switch over to a spatula or whisk as the batter thickens).
Customize to your preference (see full options below)
I strongly recommend Cinnamon: Add generous amounts of ground cinnamon to your taste. Once the batter is poured in the pan, dash a layer of cinnamon on top and leave to be crusted in the oven.
Batter:
Gain City: After flour, add 1-1 ½ scoops of protein powder of your choosing. Preferably unflavored or vanilla. **Note: don’t add too much or the consistency of your bread may be funky.
Chocolate Lovers: After flour and cinnamon, stir in a generous amount of chocolate chips into your batter. If you have cocoa powder laying around, 1-2 tbsp can go a long way to transforming this bread.
Garnish:
Nutjob: Crush nuts of your choosing (I prefer cashews) to use for garnish/crust. To do this, take sprinkle the crushed nuts on top of the batter after you pour it into the pan. Lightly press into the batter with your fingers before you put it in the oven to bake.
Fall vibes: Crush apple cider donuts to use for garnish/crust. To do this, take the pan out after 30 minutes and add crushed donut bits on top. Lightly press into the batter with your fingers before you put it back in the oven to finish baking.
Get that bread! Pour batter into the pan and bake for an hour. After 60 minutes, use a toothpick to check that the bread is finished baking. If you poke the middle of the loaf and the toothpick comes back with raw batter, put back in for 10-20 more minutes. If the crust is already baked to your satisfaction, you can cover with aluminum foil so that only the inside of the loaf continues to bake.
Take it out of the oven and let it rest for at least 15 minutes before serving or keeping for yourself. Either bring the whole loaf with you to your next destination, or slice and put into ziplock bags for an easy grab-and-go snack. Best within a couple of days.
Fun dessert option (as pictured above): spread a thin layer of nutella and blueberries over each slice for a sweet and savory delight!
🍴ally, president
Dish: ube rolls
This was one of the first bread recipes I ever made and was so well loved by my family that it is still a common request for them whenever I go home. I have always been extremely intimidated by recipes that require rising dough and kneading. Being able to successfully make these ube rolls on multiple occasions built up my confidence for these types of recipes and made me a better baker!

Ingredients:
Bread
⅔ cup heavy cream
1 cup + 1 tbsp milk
1 egg
⅓ cup sugar
4 cups flour
1 tbsp active dry yeast
1 and ½ tsp salt
Filling
1 lb ube (frozen ube, can get from asian store)
1 can condensed milk
1 can coconut milk
½ cup butter
Glaze
3 tsp sugar
2 tsp water
Instructions:
Filling
1. Melt butter over medium heat
2. Add coconut milk and condensed milk, stir until heated
3. Add ube and stir. Takes 40-50 min until thick and sticky
Bread
Combine heavy cream and milk in microwaveable bowl, heat in microwave for 40 sec at a time until 115°F (around 3 rounds of 40 sec).
In stand mixer, add milk, egg, sugar, flour, yeast, salt. Mix on low, then medium for 15 min.
Gather dough and set for 1 hour-1.5 hours. Knead for 5 minutes again. Divide to 2 parts, roll to rectangle.
Spread thin layer of ube, roll to tight log. Cut and let rise for another hour.
Preheat oven to 350°F Bake for 15 mins. Brush glaze over rolls.
🍴Elise, Co-marketing Director
Dish: lemon possets
These are super straightforward and easy to make, but I hold them near and dear to my heart because whenever I make them, I get brought back to that random Tuesday night in UHall during my sophomore year – me and my girlfriends were just craving some sweet and tangy desserts but we were way too broke #collegestudents. It’s still one of my favorite “treat yourself” recipes till this day.

Ingredients:
12 large lemons (preferably thick-skinned ones for easier scooping)
6 cups (1.5 liters) heavy cream
1 ½ cups (300 grams) granulated sugar
9 tablespoons (about 135 mL) freshly squeezed lemon juice (you'll get this from the lemons you're hollowing out!)
Zest from 3 of the lemons (before juicing)
Fresh berries, like raspberries or blueberries (optional)
Mint leaves (optional)
Extra lemon zest curls (optional)
Instructions:
Prepare the lemons:
Cut a tiny slice off the bottom of each lemon so they can stand upright.
Slice off the top third of each lemon (like you're making a little lid, optional to keep or discard).
Carefully scoop out the inside of each lemon with a spoon or melon baller — work over a bowl to catch the juice.
Strain the collected juice to remove seeds and pulp — you’ll use it for the posset.
Zest and juice:
Before scooping, zest 3 of the lemons.
Make sure you have about 9 tablespoons of fresh lemon juice total. (If you come up a little short, juice an extra lemon.)
Cook the cream mixture:
In a large saucepan, combine the heavy cream, sugar, and lemon zest.
Stir over medium heat until the sugar completely dissolves.
Bring to a gentle boil, then lower the heat and simmer for 3 minutes, stirring occasionally.
Add the lemon juice:
Remove the pan from the heat.
Stir in the strained lemon juice – the cream will thicken slightly.
Strain for smoothness (optional):
Strain the mixture through a fine sieve into a large bowl or jug to remove the zest and any lumps.
Fill the lemons:
Carefully pour or spoon the mixture into the hollowed-out lemon shells, filling almost to the top.
Transfer the filled lemons onto a tray (use crumpled foil nests if needed to help keep them upright).
Chill:
Refrigerate for at least 4 hours (or overnight) until completely set.
Serve:
Garnish the tops with a berry, a mint sprig, or a little twist of lemon zest if you like.
Serve cold
🍴alessa, Co-Editorial Director
Dish: tres leches cake
Growing up, vanilla cake was my favorite, and then my abuela made me tres leches, which is way better than a boring vanilla cake. It’s so sweet, moist, and creamy. This dish never fails to disappoint me and always puts me in a good mood after making it—and eating way too much of it. Even though there will be a lot of dishes to clean after, one bite of this tres leches will prove that the dirty dishes are worth it.

Ingredients:
Cake
1½ cups of flour
1½ tsps of baking powder
½ tsp of salt
5 eggs (to be separated)
1½ cups of granulated sugar
1 tsp of vanilla extract
½ cup of whole milk
4 tbsp of unsalted butter
Filling
1 can of La Lechera sweetened condensed milk (14 oz)
1 can of evaporated milk (12 oz)
½ cup of whole milk
1 tsp of vanilla extract
Whipped Cream
2 cups of heavy cream
1 cup of granulated sugar
1 tbsp ground cinnamon
4 strawberries
Instructions:
Preheat oven to 350°F and grease a baking pan with cooking spray.
In a large bowl, whisk flour, baking powder, and salt to combine ingredients.
Separate eggs by cracking an egg into a small bowl and scoop out yolk with a spoon and place in a separate medium bowl.
Beat egg yolk using a handheld mixer on medium-high speed.
Combine the mixed yolks with 1 cup of sugar in and beat with a handheld mixer until the mixture is fluid yet thick.
Add the vanilla extract and beat to combine.
With the egg whites, place them into a different large bowl and beat them with clean, dry beaters until they form soft peaks that fold over themselves.
Add ¼ cup of sugar and beat until the mixture holds firm peaks.
Add egg yolk mixture to the bowl with the dry ingredients, then scrape the bowl with a rubber spatula to use up all the egg mixture.
Add whole milk and melted butter (that has cooled to room temperature) and beat to combine.
Fold the egg white mixture into that same bowl until combined and scrape the bottom and sides of the bowl as you fold, but be gentle to avoid deflating the egg whites.
Pour batter into greased baking pan and bake for approximately 30 minutes, or until a toothpick inserted into center of the cake comes out clean
Let cake cool, and as it does, start with the filling by whisking all three milks and the vanilla extract together in a medium bowl until combined and smooth.
Poke holes all over the cake with a fork.
Pour the filling evenly over the cake in small batches, waiting 10-15 minutes between each batch to not overflow the cake with milk.
Refrigerate until filling is fully absorbed into the cake for about 1-3 hours.
When ready for the cream, beat heavy cream and ½ cup of sugar in large bowl until it has stiff peaks.
Spread the whipped cream to cover the entire cake using a rubber spatula.
Lastly, dust the cake with cinnamon sugar and top it off with some sliced strawberries, and ta-da, the cake is magically ready to taste!
🍴sasha, Co-social Director
Dish: pineapple upside down cake
This recipe was present throughout my childhood, most notably any celebration my grandmother hosted. This was her favorite cake and it continues to be a testament to who she was as a person. Adapted from a Betty Crocker recipe, this cake will melt in your mouth and have you wanting more!

Ingredients:
1 box of classic yellow cake mix
1 cup water – substitute ½ cup orange juice and ½ cup water
3 large eggs
½ cup vegetable oil
Light brown sugar
1 can of sliced pineapples or crushed pineapple in juice (6 to 8 slices for each pan)
½ - ¾ stick butter
½ cup orange juice
Maraschino cherries (optional for center of pineapple slices)
Instructions:
Preheat oven to 350°F
Split butter in half and add each half to one pan – melt butter in pan in oven for approx. 5 minutes
Check pan to see how butter is melting – avoid burning. If a small chunk is still remaining, take pan out of oven as the butter will continue to melt.
Sprinkle layer of brown sugar on top of melted butter as evenly as possible.
Lay pineapple rings or crushed pineapple on top of brown sugar.
(optional) Pat dry cherries and add to center of pineapple slices.
Press pineapples and cherries into sugar butter mixture
Prepare cake batter according to package with ½ water, ½ orange juice instead of the called for 1 cup water.
Pour prepared batter over the sugar/pineapple base in pans.
Bake according to package
Remove from oven and use a knife around edge of pan to loosen cake
Place heat proof serving platter on top of cake pan and flip over. Let the cake rest for a few minutes.
Gently lift the cake pan. If cake feels stuck, place pan back onto plate and tap base of pan to loosen. Gently lift again.
Let cake rest & cool. Serve or refrigerate.
🍴jules, Co-marketing Director
Dish: strawberry milk tea tiramisu
This egg-free tiramisu recipe holds a special place in my heart as it is the first recipe I’ve developed! I first made it for a CNY celebration (hence the snake stencil). This recipe came to be after being unable to find one like this on the internet. I decided to pull different elements from different tiramisu recipes to create my own. After 2 rounds of recipe testing, I finally found the perfect ratio of the following ingredients to elicit the nostalgic strawberry milk tea flavor.

Ingredients:
1 package of Ladyfingers
1 ½ cups cold heavy whipping cream
8 oz container cold mascarpone cheese
1 tsp vanilla extract or paste
Pinch of kosher salt
1 tbsp finely ground black tea leaves
⅓ cup granulated sugar
4-6 packets of NITTOH strawberry royal milk tea
2 cups steeped black tea (use 3-5 tea bags, depending on how strong you want it)
1 jar of Strawberry jam (any brand works)
Freeze-dried strawberry powder for dusting the top
Snake stencil (optional)
Instructions:
Prepare the Tea Base:
Brew 2 cups of strong black tea using 3-5 tea bags, depending on your preferred strength.
While the tea is hot, mix in 4-6 packets of Nitto Strawberry Royal Milk Tea until fully dissolved.
Let the tea cool to room temperature, then chill it in the fridge.
Make the Cream Mixture:
In a large bowl, whip 1½ cups cold heavy whipping cream until soft peaks form.
Add the cold mascarpone cheese, 1 tsp vanilla extract, a pinch of kosher salt, 1 tbsp finely ground black tea leaves, and ⅓ cup granulated sugar.
Continue whipping until smooth and medium-stiff peaks form. Be careful not to overwhip.
Assemble the Tiramisu:
Lightly dip each ladyfinger into the chilled tea mixture—just a quick dunk, so they don't get soggy.
Arrange a layer of soaked ladyfingers in the bottom of your serving dish.
Spread a thin layer of strawberry jam over the ladyfingers.
Top with a generous layer of the mascarpone cream mixture.
Repeat the layers: dipped ladyfingers, strawberry jam, and cream until you run out of ingredients, finishing with a layer of cream on top.
Chill:
Cover the tiramisu and refrigerate for at least 4 hours, or overnight for best flavor.
Decorate:
Right before serving, dust the top evenly with freeze-dried strawberry powder.
If using, place a snake stencil over the tiramisu and dust more strawberry powder over it for a fun design. Carefully lift the stencil to reveal the pattern.
Serve and Enjoy!
So whether you’re in the mood for some unconventional Coca-Cola wings or feel brave enough to bake a pineapple upside down cake, this cookbook has got you covered. If you make any of these recipes, be sure to tag @biteclubnyu on Instagram so we can see your beautiful creations! Bite Club Spring 2025 E-Board signing off until next semester.


Comments